Volume Rocker Button Replacement Compatible with shokz openrun pro
- PRESS VOLUME AGAIN — A missing, cracked or worn outer button interrupts a simple volume adjustment while you listen at your desk. This small replacement rocker puts an external pressing surface back on your headphones, so your fingers press the existing volume switches through a button again. Replace the damaged outer control and get back to adjusting your listening level from your headphones.
- KEEP YOUR CONTROLS — When your headphones\' internal volume switches still work, damage to the outer rocker does not call for replacing those controls. This button works with the switches already inside your headphones: the rocker is the surface your finger presses, and the switches underneath do the work. At your home workbench, replace the worn external part while keeping the existing internal controls.
- READ EACH END — Turn your music up or down using the plus and minus markings on the button\'s surface. The marked ends show which side to press for each volume adjustment, giving you a visible guide when you pick up your headphones before a listening session. Look at the symbols, choose your adjustment and press the corresponding end rather than guessing which side raises or lowers the sound.
- ALIGN BEFORE PRESSING — At your workbench, line up the underside locating features with the matching opening on your headphones, then check alignment before pressing the button into place. Those features position the rocker at the opening for fitting.
- CHECK BEFORE ORDERING — Compare your headphones\' model, original button outline, underside clips and mounting opening before you order. Looking at those details together lets you assess the match beyond the visible top of the rocker. WHAT\'S IN THE BOX — Only the item named in the title. No hardware is included (see the description).
Your headphones still respond to their volume switches, but the outer button is missing, cracked or worn. Changing the sound level is no longer the simple press it used to be.
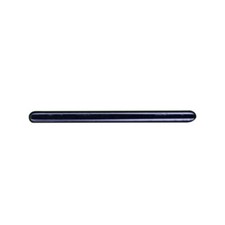
This small replacement volume rocker button puts an accessible pressing surface back over your headphones\' existing internal volume switches. It replaces the external control you touch, not the controls inside. When the damage is limited to the outer button and the switches still operate, this is the part that puts a rocker between your finger and those switches again.
Plus and minus markings identify the two adjustment ends. Before you start your music at your desk or settle in for a listening session at home, look at the marked surface and choose the end for the volume change you want. The button gives you a physical surface to press while the existing switches handle the adjustment underneath.
Before ordering, compare your headphones\' model, original button outline, underside clips and mounting opening. Check these details together rather than judging the match by the top surface alone. During fitting, align the underside locating features with the matching opening on your headphones. Check that alignment before pressing the rocker into place. Allow for visible texture lines on the surface.
For headphone owners handling a small external-button repair at home or at a workbench, this part keeps the job centered on the damaged outer control. Lay out your headphones, inspect the opening and compare the attachment details before fitting.
HARDWARE NOT INCLUDED: Only the item named in the title is in the box. Every setup is different: depending on yours, mounting it or attaching it to an existing part may use hardware you already have, such as the original screws, or you may need to buy your own screws, bolts, tape or adhesive to suit your situation. No hardware of any kind is included with this listing.
When you click on links to various merchants on this site and make a purchase, this can result in this site earning a commission. Affiliate programs and affiliations include, but are not limited to, the eBay Partner Network.

 Volume Rocker Button Replacement Compatible with shokz openrun, 2 Pack, Black$21.99
 Motorola Moto One 5g Ace Volume Rocker Button Purple$6.99
 Motorola Moto G Power 2023 Xt2311 Volume Rocker Button$10.99
 Volume Rocker Key Side Button Part for Motorola Moto G Power 2025 XT2515 (Pur...$10.91
 Cosmetic Button Volume Rocker for Motorola Moto G 5G 2023 Replacement Part$9.99
 Cosmetic Button Volume Rocker for OnePlus 7 Pro Mirror Gray Replacement Part $9.99
 Cosmetic Button Volume Rocker for Motorola Moto G 5G 2023 Replacement Repair $9.99
 Cosmetic Button Volume Rocker for OnePlus 7 Pro Nebula Blue Replacement Replace$9.99
 www.userbars.org














