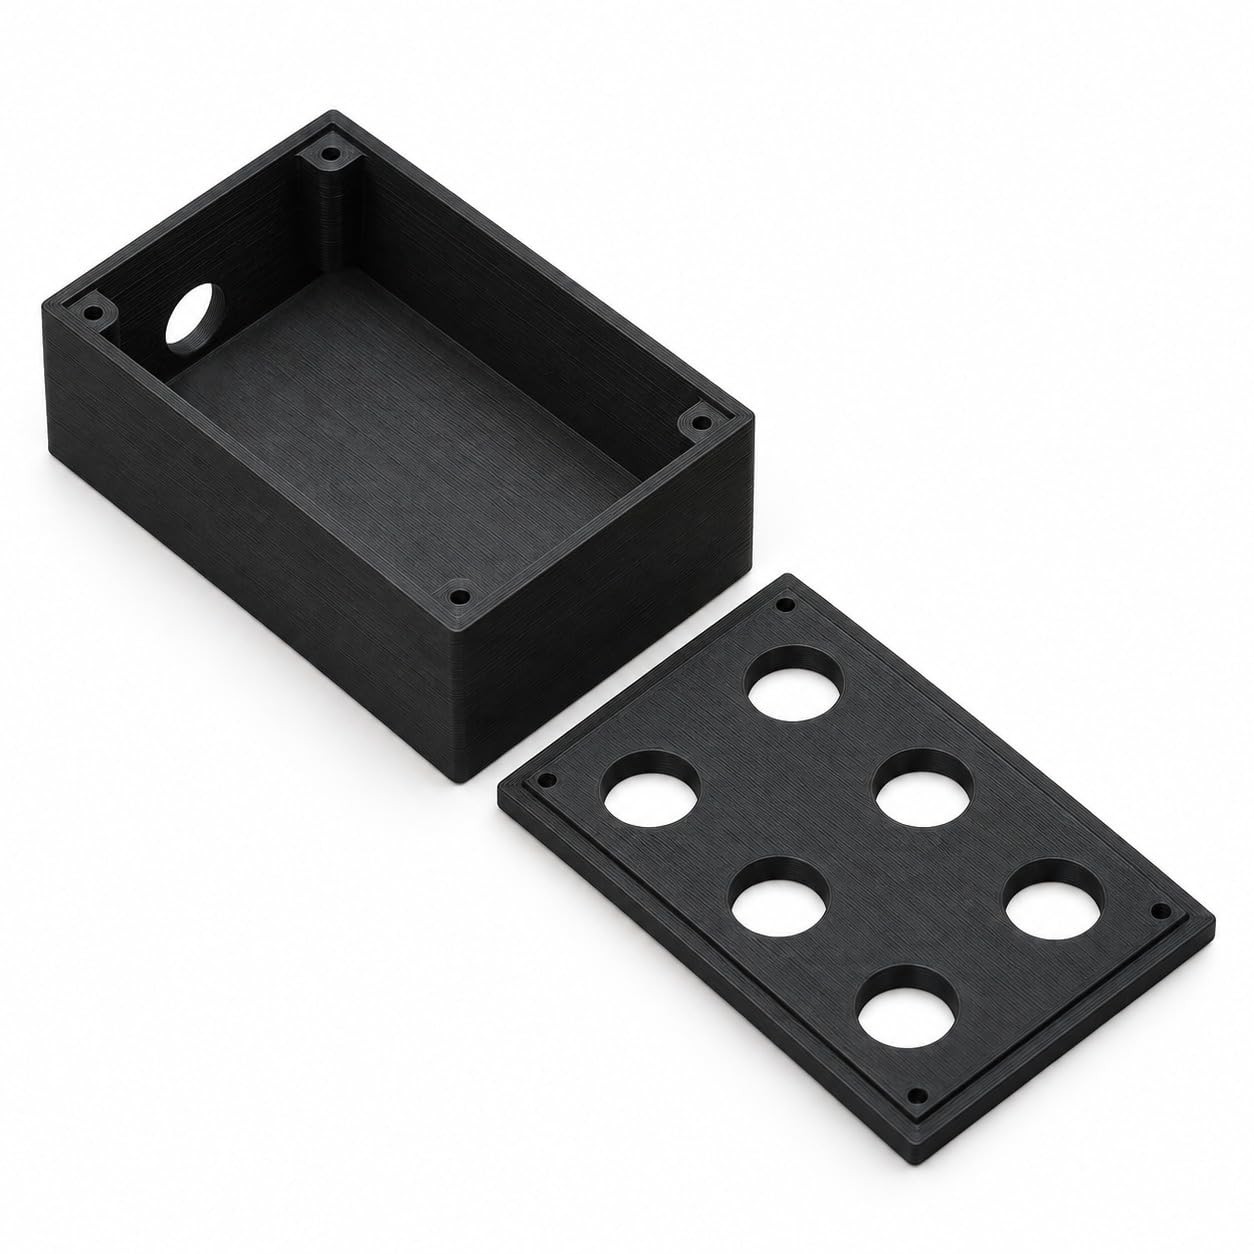
Six-Button Box Enclosure Compatible with Arduino Pro Micro
- YOUR CONTROLS TOGETHER — Bring your simulator buttons and their control electronics into a dedicated enclosure, keeping the controls grouped in one accessible panel instead of leaving your build as separate components. Once assembled with switches, electronics and suitable programming, the box becomes a dedicated panel for simulator functions, giving you a single place to reach for your panel\'s button inputs.
- SIX MOMENTARY INPUTS — Put six push-button controls together for your simulator, with an enclosure that uses 16mm momentary switches and gives each input a place in your dedicated panel. Your assembled and programmed button box provides press-and-release controls for simulator functions, while the specified switch size keeps component selection focused on the buttons this housing uses before you start assembly.
- COUNTERSUNK SCREW ASSEMBLY — Put your simulator enclosure together using the specified countersunk fasteners, with the screw size and quantity established for assembly as you bring the button panel and its control electronics into one housing. Needs 6x 16mm momentary push-button switches, 1x compatible microcontroller board, a GX12 aviation plug and 4x M3 x 12mm countersunk screws, all sold separately.
- CONTROLS MEET ELECTRONICS — House your controller board with the buttons it reads, giving your simulator panel a place for both the physical inputs and the electronics that handle them. The original electronics setup used a simulator controller uploader for schematics and programming, a reference for the circuit and code work that turns the enclosure, switches and board into a functional simulator control panel.
- AVIATION PLUG INTEGRATION — Give your GX12 aviation plug a place in the button box alongside your switches and controller board, keeping the panel\'s connection component within the same enclosure project. WHAT\'S IN THE BOX — Only the item named in the title. No hardware is included (see the description).
Bring your simulator controls together in a button box with a clear purpose: housing your push-button switches and their control electronics in one accessible panel. The SplashNColor six-button enclosure gives your DIY control-panel project a dedicated home, so your buttons belong together instead of remaining separate components waiting for a housing.
Build around six 16mm momentary push-button switches for a defined group of press-and-release inputs. The six-button format keeps your simulator controls together at the point of use, while the stated switch size tells you which buttons the enclosure uses. After assembly, wiring and suitable programming, those switches become the inputs for your dedicated simulator control panel.
The electronics build calls for one compatible microcontroller board and a GX12 aviation plug, bringing the controller and connection component into the same enclosure plan as your buttons. You start with a housing that uses these components rather than selecting a general box and working out what belongs inside it. Assembly requires four M3 x 12mm countersunk screws; the switches, controller board, aviation plug and screws are purchased separately.
The original electronics setup used a simulator controller uploader for schematics and programming, providing a reference approach for the circuit and code work behind the panel. This is the enclosure for that hands-on build: you source the specified components and complete the electronics setup that makes the controls operate simulator functions.
Hardware needed (not included): 6x 16mm momentary push button switches, 1x Pro Micro, GX12 aviation plug, 4x M3 x 12mm countersunk screws. Screws, bolts, nuts, anchors, adhesive, adapters, cables and any other hardware are also not included, so buy what you need separately.
When you click on links to various merchants on this site and make a purchase, this can result in this site earning a commission. Affiliate programs and affiliations include, but are not limited to, the eBay Partner Network.

 Tech Solutions Six-Button Analog Gamepad Model TS62D Controller New In Box CIB$20.99
 Six-Button Box Enclosure Compatible with Arduino Pro Micro, Black$19.99
 one new eaton MOELLER Six position button box M22-I6 Fast Shipping$49.65
 Antique Leather Collar Box with Six Collars, Snap Button Closure$39.00
 1/4-20 X 5/8 Torx Six Lobe Button Head Steel Truss Bolt Screw BOX of (3000)$199.98
 Radio Shack Sega Genesis/Megadrive Six Button Turbo Controller In Box Rare$39.99
 J1 Glow Color-Shift USB Sim Racing Button Box for PC Pink Yellow 6 Button$39.99
 1/4-20 X 3/4 Torx Six Lobe Button Head Black Steel Bolt Screw BOX of (2250)$189.98
 www.userbars.org