If you want to buy in bulk, please note that Speedpak cannot send orders over $800, please choose Expedited Shipping.Descriptions
This 4-layer acrylic oversized fan enclosure is a new product designed to provide shell protection and cooling solutions for Raspberry Pi clusters, Raspberry Pi NAS servers, Jetson Nano clusters, and disk array clusters.
Features
- Colorful LED Huge Fan
- Compatible with Raspberry Pi, 2.5MM HDD, Jetson Nano
- Extramly heat dissipation effect
- Flexible Mounting position
There are two popular solution for this case
- Raspberry Pi smart NAS Cluster.
- Jetson Nano AI Deep Learning Cluster storage.
Raspberry Pi 4-Layer Cluster Case
- Support up to 4 pcs of Raspberry Pi Board
- Access to all ports of Raspberry Pi board
- With 120mm 5V RGB LED Fan for better heat dissipation
- With instruction for easy installation
- Compatible with Raspberry Pi4B/3B+/3B/2B/B+, 2.5MM HDD, Jetson Nano
Step 1. Fixed the copper sticks to acrylic layer after peeling off the protection film.
Step 2. Paste heat sinks to Raspberry Pi and fix the raspberry pi to the acrylic layer with M2.5 nuts.
Step 3. Fixed the bracket holder to the fan with long steel screws and nuts.
Step 4. Fixed other device as mentioned before, for example: 4 pieces of Raspberry Pi or other combinations.And then place them as following picture, please pay attention to the direction where there is a “R” mark.
NOTE: Please beware of the direction of the acrylic holder.
Caution: Incorrect polarity may cause damage to your device!
Step 5: Connect the fan cable to Raspberry Pi on 5V and GND Pin.
Step 6. Place another pieces of acrylic layer on the top and fixed it with long steel screws.
Step 7. Tighten the long steel screws.
Step 8. Install acrylic crystal hander with M3x9mm screws.
[Technical class="a-spacing-base" style="box-sizing: border-box; padding: 0px; margin-top: 0px; margin-right: 0px; margin-bottom: 14px !important; margin-left: 0px;">8-Layer & 12-Layer is here

When you click on links to various merchants on this site and make a purchase, this can result in this site earning a commission. Affiliate programs and affiliations include, but are not limited to, the eBay Partner Network.

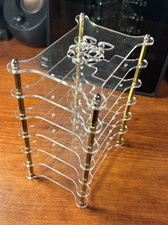 Stackable 6-Layer Raspberry Pi Cluster Case$20.00
 52Pi Cluster Stackable Rack Case with Cooling LED Fan for Raspberry Pi Jetson Na$39.99
 Cluster Stackable Rack Case with Cooling LED Fan for Raspberry Pi Jetson Nano$71.99
 www.userbars.org