1U Rack Mount Compatible with JetKVM – Left or Right Installation
- LESS LOOSE EQUIPMENT — When your KVM is sitting loose among cables and other gear, give it a fixed place in your server rack. The 1U rack mount keeps your KVM alongside the equipment it serves, so your home lab or network cabinet has a clear arrangement instead of another item left on a desk or shelf; start your next equipment check at the rack, with your KVM already in place.
- EXISTING MOUNTING POINTS — Attach your KVM through its original screw holes using an M2 screw, so the connection uses the mounting points already on your equipment. When gathering parts for a home-lab build or network cabinet installation, put that screw on your shopping list before you start; you get the plastic part only, and the required M2 screw and any other hardware your setup calls for are not included.
- CHOOSE YOUR SIDE — Install the mount on the left or the right to suit the way you arrange your rack equipment. Whether you are adding your KVM to a home lab or rearranging a network cabinet at work, that choice lets you put it on the side that works with your layout from the start, rather than having to plan the rest of the rack around a single fixed mounting side.
- MORE RACK OPTIONS — Give your KVM a place in a full-width server rack or a narrower home-lab setup, with support for 19-inch, 10-inch and narrower racks. Check your rack width as you plan the installation, then keep your KVM with the network equipment it serves, whether you are organizing a compact cabinet at home or building out a larger rack in a data center.
- PORTS STAY ACCESSIBLE — Connect HDMI, USB-C, Ethernet and power while your KVM stays mounted, rather than taking it out just to reach a connection. The open-frame structure and large cutout window leave those ports exposed, so when you are setting up your home lab or changing a connection in a server cabinet, you work at the ports without an enclosing housing in the way. WHAT\'S IN THE BOX — Only the item named in the title. No hardware is included (see the description).
Your KVM is sitting loose on a shelf, surrounded by cables and the equipment it serves. When you rearrange your rack, it is another loose item to find room for instead of part of the installation.
Give it a fixed place with this 1U rack mount. Your KVM attaches through its original screw holes, keeping it with your server or network equipment rather than taking up space on a separate desk or shelf. The 1U format brings it into your rack layout, where you check connections and work on the rest of your equipment.
Choose the left or right side to match the way you arrange your rack. That choice matters when you are adding your KVM to an existing cabinet and want its position to work with the equipment already there. The mount supports 19-inch, 10-inch and narrower racks, giving you options for both a larger server installation and a compact home-lab rack. Check your rack width as you plan where it will go.
Mounting your KVM does not mean enclosing its connections. The open-frame structure has a large cutout window that leaves HDMI, USB-C, Ethernet and power ports exposed. Plug in your connections during setup or reach them later when you change a cable, with your KVM still in its rack position. You get a mounting structure around your equipment, not a housing between you and its ports.
For home-lab enthusiasts, this is a way to bring a loose piece of equipment into the rack you are building and organizing. For IT staff working in network cabinets or data centers, it puts your KVM alongside the equipment it serves.
HARDWARE NOT INCLUDED: Only the item named in the title is in the box. Every setup is different: depending on yours, mounting it or attaching it to an existing part may use hardware you already have, such as the original screws, or you may need to buy your own screws, bolts, tape or adhesive to suit your situation. No
Hardware details: the box holds the plastic part only. If your setup needs screws, adhesive or other fasteners, they are not included.
When you click on links to various merchants on this site and make a purchase, this can result in this site earning a commission. Affiliate programs and affiliations include, but are not limited to, the eBay Partner Network.

 Gateway Rack Mount Compatible with UniFi UCG-Fiber, Black$33.00
 1U Rack Mount Compatible with TP-Link Er7206, ER707-M2, oc200, Black$84.00
 Spare Tire Carrier Rack Mount Compatible with 14-23 Polaris RZR XP$108.75
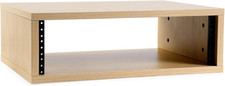 Wooden Desktop Studio Rack, 19-Inch Rack-Mount Compatible, 373Mm Usable Depth$181.99
 Network Switch Rack Mount – Compatible with TP-Link TL-SG108, Black$20.99
 Spare Tire Carrier Rack Mount Compatible with 14-23 Polaris RZR XP$107.84
 Rack Mount Kit Universal 1U Rack Ears with Adjustable Holes Distance, Compatible$22.40
 19 Inch Rack Mount Compatible with 1RU for Router and Controller, Black$84.00
 www.userbars.org