Rack Mount Brackets Compatible with ReoLink RLN36 NVR + JetKVM – 19-Inch Rack
- RACK YOUR NVR — When your NVR needs a home alongside your rack equipment, these brackets give its housing the mounting points it needs. The left and right bracket design connects your recorder to a 19-inch rack, putting it alongside the rest of your rack-mounted gear instead of leaving you to find somewhere else for the unit when you finish the installation.
- KEEP CONTROL TOGETHER — Put your KVM beside your NVR instead of giving it a separate spot elsewhere in your setup. The mounting arrangement accommodates one KVM alongside your recorder in a 1U format, bringing the related equipment together when you build out your home rack or organize an IT installation; dedicated attachment points make your KVM part of the arrangement rather than another loose component nearby.
- MAKE ROOM FOR CONNECTIONS — Give your keystone jack a mounting location alongside your NVR, so the connection is part of the same rack arrangement rather than another component to place elsewhere. The bracket design accommodates one keystone jack along with your recorder and KVM, keeping the jack with the equipment it serves when you plan a home setup or put together a rack for work.
- PLAN YOUR FASTENERS — Attach each bracket through your removed NVR cover with two M3 10mm screws and M3 hex nuts, replace the front cover-retaining screws on each side with M3 12mm screws, and secure your KVM through the bracket holes with two M2 12mm screws replacing its top M2 screws.
- SUPPORT THE REAR — Plan the back of your rack as carefully as the front: your NVR is rear-heavy because of its drives, so separate rear support is required to prevent sagging. WHAT\'S IN THE BOX — Only the item named in the title. No hardware is included (see the description).
Your NVR needs a place in your equipment rack, and its control hardware and connection jack need somewhere to go with it. Finding separate spots for those components turns one installation into several mounting jobs.
These plastic rack mount brackets bring your NVR, one KVM and one keystone jack into the same 19-inch rack arrangement. The left and right bracket design connects your recorder\'s housing to the rack mounting points in a 1U format, putting the recorder alongside your other rack-mounted equipment. Your KVM gets an attachment location beside the recorder, while the keystone jack gets a place in the same arrangement instead of needing its own location elsewhere.
For installation, remove your NVR cover and attach each bracket using two M3 10mm screws with M3 hex nuts. Replace the cover-retaining screws toward the front on each side with M3 12mm screws. Your KVM attaches through the bracket holes using two M2 12mm screws in place of its two top M2 screws. Check the specified screw lengths against the internal components before fastening everything together; the screws must clear the working components inside your NVR. The plastic part is supplied without screws, nuts, rack hardware or rear support.
Plan separate support beneath the rear of your NVR as part of the installation. The drives put more weight toward the back, and that rear-heavy weight distribution requires support to prevent sagging. Account for both the front attachment and the rear support before settling your recorder into its rack location.
HARDWARE NOT INCLUDED: Only the item named in the title is in the box. Every setup is different: depending on yours, mounting it or attaching it to an existing part may use hardware you already have, such as the original screws, or you may need to buy your own screws, bolts, tape or adhesive to suit your situation. No hardware of any kind is included with this listing.
When you click on links to various merchants on this site and make a purchase, this can result in this site earning a commission. Affiliate programs and affiliations include, but are not limited to, the eBay Partner Network.

 Reolink RLN16 / RLN32 NVR 1U Rack Mount Brackets – JetKVM$18.95
 Rack Mount Brackets Compatible with Neural DSP Quad Cortex, Grey$44.50
 Dell OptiPlex Micro (MFF) 1U 19" inch Rack Mount - Single or Dual Mount Options$24.99
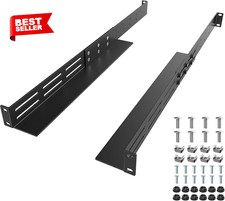 1U Universal Rack Mount Rails 4-Post Server Rack Shelf Rail Kit$36.82
 LOT OF 5 PAIRS RACK MOUNTING BRACKETS 2U ASY-00920-03 AO FOXCONN$45.00
 For Cisco C3850-RACK-KIT Catalyst 3850 C3850 Series Switch Rack Mount Brackets$12.99
 RACK MOUNTING BRACKETS 1U ASY-00921-03 For Arista 7020 7160 7920 7050 7060 7280$15.99
 2 Pack - 2U 19" Network Rack Bracket Ears Universal Mount - 3D Printed$9.90
 www.userbars.org














