*ITEMFEATURES:1.Fits Vehicles ofthe Following Years and Make:2005-2010 Toyota SiennaFront RearDriver & Passenger Side Strut & Spring Assembly Exact Fit for easy installation3.100% BRAND NEW and tested to meet or exceed OEM specifications4.Premium ISO/TS 16949 quality - guaranteed highest quality available5.Engineered for superior durability, backed by industry leading warranty6.These are brand new, not used or junkyard parts. (2) Front Complete Struts + (2) Rear Shocks Absorbers For 2005-10 Toyota Sienna
*ITEMFEATURES:
1.Fits Vehicles ofthe Following Years and Make:
2005-2010 Toyota Sienna
Front RearDriver & Passenger Side Strut & Spring Assembly Set
2.Guaranteed Exact Fit for easy installation
3.100% BRAND NEW and tested to meet or exceed OEM specifications
4.Premium ISO/TS 16949 quality - guaranteed highest quality available
5.Engineered for superior durability, backed by industry leading warranty
6.These are brand new, not used or junkyard parts.
7.Each complete assembly is built to meet or exceed exact OEM specifications.
8.High corrosion resistance and long service life. Steel rod is mirco-polished with double chrome plate.
9.Newer Valving technology operates in stages based on the velocity of the car.
10.Use Teflon bonded piston seal to keep friction down and temperature cooler so that valving stays firmer.
11.All-around welding on the spring seat.
12.Includes all of the following (where applicable):strut/shock, coil spring, strut/shock mount, boot, bumper kit, spring seat and isolator.
These are guaranteed exact fit and don't require the use of a dangerous spring compressor to swap springs, so they are very easy to install!
The struts/shocks are nitrogen gas charged and tuned for each specific vehicle application. They will greatly improve the ride, handling, and safety of your vehicle!
* PRODUCTDESCRIPTION :
* HOW TO INSTALL :
Step 1:Before you lift the vehicle, loosen lug nuts one full turn.
Step 2:Jack up vehicle and use jack stands for safety & remove the tire from the rotor.
Step 3:(Wheel alignment is necessary after strut replacement.) Marking the position of all the bolts will help keep the alignment close to original and save time aligning. Use a colored pencil to mark the old strut on the bolt.
Step 4:Use penetrating oil (such as WD40) to coat any rusted fasteners, let soak for approximately 1 hour.
Step 5:(Optional) While waiting for oil to soak, take this time to inspect all other components that may need replacement (brake pads, rotors, brake hoses, ball joints, CV boots, tie rod ends, bushings, sway bars, etc).
Step 6:Remove any brake line or wire attachments from the strut body. Do not disconnect brake lines (if possible)! Opening brake lines will require bleeding of the brake system.
Use extreme caution when removing brake lines from your struts, as any damage to your brake line can result in expensive and time consuming repairs.
Step 7:Remove sway bar attached to the strut assembly or control arm.
Step 8:Remove the tie rod (only if it attached to the body of the strut, if not leave it attached to the steering knuckle).
Step 9:Remove the strut to knuckle bolts at the bottom of the strut. On some vehicles, the brake caliper and rotor may need to be removed to gain access.
Step 10:Remove the upper mounting plate bolts located in the engine or trunk compartment. Do not remove the center retaining nut! It is not safe to unload the spring from the assembly in this position.
Step 11:Carefully remove the old strut assembly from the vehicle. Be very cautious not to let the strut "drop" down on your brake line, rotor or drum.
Step 12:Install the new Complete Strut Assembly in the reverse order as above (steps 11-6). Using an anti-seize compound on all fasteners is suggested.
Step 13:Carefully double check your work and make sure everything is tightened to manufacturers torque specifications.
Step 14:Replace the tire the rotor and tighten to manufacturers torque specifications.
Step 15:Slowly lower the vehicle down after removing the jack stands. Pay very close attention to any odd sounds when the vehicle is lowered onto the new Complete Strut Assemblies.
Step 16:It is very important that you immediately "road test" your vehicle right away to ensure that installation was done properly. Listen and feel for common signs of incorrect installation while driving slowly over speed bumps, rough road or potholes.
* INSTALLATION PRECAUTIONS :
1. When the original car shock absorber is removed, the corresponding positions of the top rubber and spring should be marked first. When replacing the shock absorber, ensure that the top rubber and the original mark points of the spring are aligned. Failure to follow this operation may cause abnormal noise in the suspension system!
2. Installing the top rubber should use special tools to manually install, remember not to use any tool to clamp the shock absorber piston rod (bright rod part), so as not to scratch the shock absorber piston rod, causing oil leakage.
3. Do not use pneumatic or electric wrenches for the top glue installation to avoid slippage or damage to the shock absorber piston rod bolts.
4. Please carefully check the model compatibility list provided by our shop to avoid buying mistakes.
(2) Front Complete Struts + (2) Rear Shocks Absorbers For 2005-10 Toyota Sienna
*ITEMFEATURES:
1.Fits Vehicles ofthe Following Years and Make:
2005-2010 Toyota Sienna
Front RearDriver & Passenger Side Strut & Spring Assembly Set
2.Guaranteed Exact Fit for easy installation
3.100% BRAND NEW and tested to meet or exceed OEM specifications
4.Premium ISO/TS 16949 quality - guaranteed highest quality available
5.Engineered for superior durability, backed by industry leading warranty
6.These are brand new, not used or junkyard parts.
7.Each complete assembly is built to meet or exceed exact OEM specifications.
8.High corrosion resistance and long service life. Steel rod is mirco-polished with double chrome plate.
9.Newer Valving technology operates in stages based on the velocity of the car.
10.Use Teflon bonded piston seal to keep friction down and temperature cooler so that valving stays firmer.
11.All-around welding on the spring seat.
12.Includes all of the following (where applicable):strut/shock, coil spring, strut/shock mount, boot, bumper kit, spring seat and isolator.
These are guaranteed exact fit and don't require the use of a dangerous spring compressor to swap springs, so they are very easy to install!
The struts/shocks are nitrogen gas charged and tuned for each specific vehicle application. They will greatly improve the ride, handling, and safety of your vehicle!
* PRODUCTDESCRIPTION :
* HOW TO INSTALL :
Step 1:Before you lift the vehicle, loosen lug nuts one full turn.
Step 2:Jack up vehicle and use jack stands for safety & remove the tire from the rotor.
Step 3:(Wheel alignment is necessary after strut replacement.) Marking the position of all the bolts will help keep the alignment close to original and save time aligning. Use a colored pencil to mark the old strut on the bolt.
Step 4:Use penetrating oil (such as WD40) to coat any rusted fasteners, let soak for approximately 1 hour.
Step 5:(Optional) While waiting for oil to soak, take this time to inspect all other components that may need replacement (brake pads, rotors, brake hoses, ball joints, CV boots, tie rod ends, bushings, sway bars, etc).
Step 6:Remove any brake line or wire attachments from the strut body. Do not disconnect brake lines (if possible)! Opening brake lines will require bleeding of the brake system.
Use extreme caution when removing brake lines from your struts, as any damage to your brake line can result in expensive and time consuming repairs.
Step 7:Remove sway bar attached to the strut assembly or control arm.
Step 8:Remove the tie rod (only if it attached to the body of the strut, if not leave it attached to the steering knuckle).
Step 9:Remove the strut to knuckle bolts at the bottom of the strut. On some vehicles, the brake caliper and rotor may need to be removed to gain access.
Step 10:Remove the upper mounting plate bolts located in the engine or trunk compartment. Do not remove the center retaining nut! It is not safe to unload the spring from the assembly in this position.
Step 11:Carefully remove the old strut assembly from the vehicle. Be very cautious not to let the strut "drop" down on your brake line, rotor or drum.
Step 12:Install the new Complete Strut Assembly in the reverse order as above (steps 11-6). Using an anti-seize compound on all fasteners is suggested.
Step 13:Carefully double check your work and make sure everything is tightened to manufacturers torque specifications.
Step 14:Replace the tire the rotor and tighten to manufacturers torque specifications.
Step 15:Slowly lower the vehicle down after removing the jack stands. Pay very close attention to any odd sounds when the vehicle is lowered onto the new Complete Strut Assemblies.
Step 16:It is very important that you immediately "road test" your vehicle right away to ensure that installation was done properly. Listen and feel for common signs of incorrect installation while driving slowly over speed bumps, rough road or potholes.
* INSTALLATION PRECAUTIONS :
1. When the original car shock absorber is removed, the corresponding positions of the top rubber and spring should be marked first. When replacing the shock absorber, ensure that the top rubber and the original mark points of the spring are aligned. Failure to follow this operation may cause abnormal noise in the suspension system!
2. Installing the top rubber should use special tools to manually install, remember not to use any tool to clamp the shock absorber piston rod (bright rod part), so as not to scratch the shock absorber piston rod, causing oil leakage.
3. Do not use pneumatic or electric wrenches for the top glue installation to avoid slippage or damage to the shock absorber piston rod bolts.
4. Please carefully check the model compatibility list provided by our shop to avoid buying mistakes.
Item SpecificsOther Part Number 172364R,172363R,37284RGas Charged Shock YesFitment Type Direct ReplacementOE Spec or Performance OE SpecCustom Bundle YesManufacturer Part Number CB814963S01Placement on Vehicle Front, Rear, Left, RightBrand SCITOOType Strut AssemblyInterchange Part Number 172364,172363,37284Product Type Complete Struts With Springs MountsIncluded Hardware NoneManufacturer Warranty 1 YearFeatures Sealed
Shipping
1. Order Processing
Orders are processed within 2 business days of payment confirmation. Please ensure your shipping and payment information is correct before completing checkout. Once payment is confirmed, we are unable to make any changes to your order.
2. Domestic Shipping (US)
All domestic orders are shipped from our US warehouse via USPS, UPS, or FedEx. Delivery typically takes 2–7 business days depending on your location and the shipping method selected.
3. Local Pickup
Local pickup is not available at this time.
4. International Buyers – Please Note
a. Import duties, taxes, and customs charges are not included in the item price or shipping cost. These charges are the buyer's responsibility.
b. Please check with your country's customs office to determine any additional costs before offerding or purchasing.
Payment
We accept multiple payment methods.
Payment is due within 7 days of the sale closing. If you are purchasing multiple items, please wait for a combined invoice before paying.
If payment is not received within 7 days, an Unpaid Item Case will be opened with , which may result in a strike against your account.
Returns
We offer a 60-day return or exchange guarantee on all brand-new items. Items must be returned in original, unused condition. Buyer pays return shipping unless the item is defective or damaged. Refunds are processed within 2 business days of receipt.
Customer Services
Q: When will my item ship?
A: Orders are processed and shipped within 2 business days of payment confirmation.
Q: Where can I find my tracking number?
A: You can find your tracking number in two ways:
Log in to your account, go to "My " → "Purchase History", and select the order.Check your email for the shipping confirmation notification sent by .
Q: How do I return an item?
A: We accept returns within 60 days of delivery. To initiate a return, please contact our customer service first. Items must be returned in original, unused condition with all packaging and accessories. A full refund will be issued to your original payment method after we receive and inspect the returned item.
response
We leave positive response upon receipt of payment. If you have any issues, please contact us before leaving response — we will resolve any problems to your satisfaction. If you are happy with your purchase, please take a moment to leave us positive response. Thank you!
Shop CategoryStore Home ABS Wheel Speed Sensor AC Compressor &Assemblies AC Compressor Control Valve+A AC Condenser & Radiator◈AC Condenser◈AC Condenser & Radiator◈Radiator Adjustable Control /Camber Arm Air Blend Door Actuator Air Cleaner Filter Box Air Diesel Heater Air Dryer Air suspensions Alternators ATV Rear Wheel Axle Auto parts◈Blower Motor◈Coilover◈complete struts◈CV Axle◈CV Axle Boot◈Dump Truck Tarp Motor◈Fuel Pump Assembly◈Ignition Coil◈Key Case◈Starter◈strut/absorber shock◈Struts/Absorbers Shocks◈Window Switch Automotive Hand Tools ball joint Ballast module Bed Step Blower Motor & Resistor Brake Dust Shield Brake Pads & Rotors◈Brake Pads◈Brake Rotors◈Brake Rotors and Pads Brake System Parts◈Brake Calipers◈Brake Drums & Brake Shoes◈Brake Pads & Brake Shoes Bumper Camshaft & Crankshaft Camshaft Position Sensor Car Antenna Cargo Cover Catalytic Converter CDI BOX Center Console Arm Coil Springs Cold Air Intake Kit Control Arms & Parts Cooling Fan Cooling Fan Clutch Crankshaft Position Sensor CV axle+Brake Pads/Rotors Cylinder Piston Gasket Kit Cylinder Piston Kit dash cover Dipstick Door handle Door Lock Actuator Driveshaft Electric Water Pump Engine Head Gasket Sets Engine Mount Engine Valvetrain Components Evaporators Fastener Fender Flares Front Bumper Lip Fuel Injectors Fuel Tank Pipe/Gas Tank Fuel Vapor Charcoal Canister Fuse Holder Box Golf Cart Parts Kit &Seat Kit Harmonic Balancer Heater Cores Height Level Sensor Home & Garden◈Portable Fans Home & Garden&Lawn Mower Parts Home Garden Pressure Washers Horns & Sirens Hub Caps Hydraulic Lifter&Roller Lifter idle air control valve Intercooler Jack Stands jumper cable Knock Sensor LED headlight Assembly A LED Headlight Assembly B LED Headlight Assembly C LED Headlight Assembly D leveling lift kit leveling lift kit+shock struts lift support Light Bar Mount Bracket Lights◈Exterior Lights◈Instrument Panel Lights◈Interior Lights◈Led Headlights◈Side/Cab Marker Lights◈Third Brake Lights Lower Kits & Parts Luggage Roof Rack Cross Bar MAP Sensor Mass Air Flow Sensor Mirror Assemblies Motorcycle Carburetor & Parts Nerf Bars & Running Boards Off-Road Axles & Half Shafts Oil Pressure Sensor Oil Pump Oxygen Sensors Parking sensor Pillar Posts Power Brake Booster Power Steering Pump+Line Hose primary drive clutch Radiator Coolant Tank Radiator Support Regulator Rectifier Rocker Panels Secondary Air Injection Pump Sensor-8 snorkel air intake Spark Plug Splash Guards & Mud Flaps Spoilers & Wings Starter Relay Solenoid Stator steering knuckle-7 Steering Rack Steering Shaft Steering U-Joint Strut Mount Sun Visor suspension kit◈suspension cj◈suspension fu◈suspension gxy◈Suspension Kits Suspension+Strut+Bearing Temperature Sensor Thermostat Housing Throttle Body Throttle Position Sensor Timing Belt Kits Timing Chain Kits Tire Pressure Sensor Tonneau Cover Transfer Case Shift Motor Truck Beds Parts Tool Box Trunk Mat Turbocharger Valve Cover Variable Timing Solenoid (VVT) vehicle speed sensor Water Pump +Tensioner+oil Pump water Pump Impeller Weatherstrip Kit wheel hub bearing Wheel Hub Bearing Knuckle Wheel Hub Centric Rings Wheel lug nut Wheel Rim Wheel Spacers winch Window Regulator window visor Windshield Wiper Motor OtherNew List Item Front Left Right for 2017 Polaris General 4 1000 CV Joint Axle Drive Half Shaft USD 66.28 Fits Land Rover Range Rover Sport 2014-19 Rear Driver Window Regulator w/ Motor USD 51.98 Rocker Panels & Cab Corners For Ford F150 Pickup 4-Door Crew Cab 2009-2014 USD 250.98 For 2017-2019 Toyota for Corolla L LE XLE Front Bumper Lip Matt-Black USD 51.98 Fits 1967-1971 GMC C15/C1500 Pickup Front Right RH Window Regulator USD 42.98 Hot Item Fuel Pump Assembly for Buick Lesabre Cadillac Deville Park Avenue Pontiac E3518M USD 31.90 For Mitsubishi Outlander 2005-2006 L4 2.4L AWD Fuel Pump Assembly USD 89.28 Fuel Pump For Chevy S10 GMC Sonoma Hombre 4.3L 97-02 Isuzu Hombre 4.3L 97-20 USD 31.99 Inline Universal High Pressure Fuel Pump With Installation Kit 0580464070 USD 19.95 2pc 3157 4114 4157 LED DRL Driving Daytime Running Light Bulbs 12SMD 6000K White USD 12.38 Warranty
(2) Front Complete Struts + (2) Rear Shocks Absorbers For 2005-10 Toyota Sienna
*ITEMFEATURES:
1.Fits Vehicles ofthe Following Years and Make:
2005-2010 Toyota Sienna
Front RearDriver & Passenger Side Strut & Spring Assembly Set
2.Guaranteed Exact Fit for easy installation
3.100% BRAND NEW and tested to meet or exceed OEM specifications
4.Premium ISO/TS 16949 quality - guaranteed highest quality available
5.Engineered for superior durability, backed by industry leading warranty
6.These are brand new, not used or junkyard parts.
7.Each complete assembly is built to meet or exceed exact OEM specifications.
8.High corrosion resistance and long service life. Steel rod is mirco-polished with double chrome plate.
9.Newer Valving technology operates in stages based on the velocity of the car.
10.Use Teflon bonded piston seal to keep friction down and temperature cooler so that valving stays firmer.
11.All-around welding on the spring seat.
12.Includes all of the following (where applicable):strut/shock, coil spring, strut/shock mount, boot, bumper kit, spring seat and isolator.
These are guaranteed exact fit and don't require the use of a dangerous spring compressor to swap springs, so they are very easy to install!
The struts/shocks are nitrogen gas charged and tuned for each specific vehicle application. They will greatly improve the ride, handling, and safety of your vehicle!
* PRODUCTDESCRIPTION :
* HOW TO INSTALL :
Step 1:Before you lift the vehicle, loosen lug nuts one full turn.
Step 2:Jack up vehicle and use jack stands for safety & remove the tire from the rotor.
Step 3:(Wheel alignment is necessary after strut replacement.) Marking the position of all the bolts will help keep the alignment close to original and save time aligning. Use a colored pencil to mark the old strut on the bolt.
Step 4:Use penetrating oil (such as WD40) to coat any rusted fasteners, let soak for approximately 1 hour.
Step 5:(Optional) While waiting for oil to soak, take this time to inspect all other components that may need replacement (brake pads, rotors, brake hoses, ball joints, CV boots, tie rod ends, bushings, sway bars, etc).
Step 6:Remove any brake line or wire attachments from the strut body. Do not disconnect brake lines (if possible)! Opening brake lines will require bleeding of the brake system.
Use extreme caution when removing brake lines from your struts, as any damage to your brake line can result in expensive and time consuming repairs.
Step 7:Remove sway bar attached to the strut assembly or control arm.
Step 8:Remove the tie rod (only if it attached to the body of the strut, if not leave it attached to the steering knuckle).
Step 9:Remove the strut to knuckle bolts at the bottom of the strut. On some vehicles, the brake caliper and rotor may need to be removed to gain access.
Step 10:Remove the upper mounting plate bolts located in the engine or trunk compartment. Do not remove the center retaining nut! It is not safe to unload the spring from the assembly in this position.
Step 11:Carefully remove the old strut assembly from the vehicle. Be very cautious not to let the strut "drop" down on your brake line, rotor or drum.
Step 12:Install the new Complete Strut Assembly in the reverse order as above (steps 11-6). Using an anti-seize compound on all fasteners is suggested.
Step 13:Carefully double check your work and make sure everything is tightened to manufacturers torque specifications.
Step 14:Replace the tire the rotor and tighten to manufacturers torque specifications.
Step 15:Slowly lower the vehicle down after removing the jack stands. Pay very close attention to any odd sounds when the vehicle is lowered onto the new Complete Strut Assemblies.
Step 16:It is very important that you immediately "road test" your vehicle right away to ensure that installation was done properly. Listen and feel for common signs of incorrect installation while driving slowly over speed bumps, rough road or potholes.
* INSTALLATION PRECAUTIONS :
1. When the original car shock absorber is removed, the corresponding positions of the top rubber and spring should be marked first. When replacing the shock absorber, ensure that the top rubber and the original mark points of the spring are aligned. Failure to follow this operation may cause abnormal noise in the suspension system!
2. Installing the top rubber should use special tools to manually install, remember not to use any tool to clamp the shock absorber piston rod (bright rod part), so as not to scratch the shock absorber piston rod, causing oil leakage.
3. Do not use pneumatic or electric wrenches for the top glue installation to avoid slippage or damage to the shock absorber piston rod bolts.
4. Please carefully check the model compatibility list provided by our shop to avoid buying mistakes.
Shipping
1. Order Processing
Orders are processed within 2 business days of payment confirmation. Please ensure your shipping and payment information is correct before completing checkout. Once payment is confirmed, we are unable to make any changes to your order.
2. Domestic Shipping (US)
All domestic orders are shipped from our US warehouse via USPS, UPS, or FedEx. Delivery typically takes 2–7 business days depending on your location and the shipping method selected.
3. Local Pickup
Local pickup is not available at this time.
4. International Buyers – Please Note
a. Import duties, taxes, and customs charges are not included in the item price or shipping cost. These charges are the buyer's responsibility.
b. Please check with your country's customs office to determine any additional costs before offerding or purchasing.
Payment
We accept multiple payment methods.
Payment is due within 7 days of the sale closing. If you are purchasing multiple items, please wait for a combined invoice before paying.
If payment is not received within 7 days, an Unpaid Item Case will be opened with , which may result in a strike against your account.
Returns
We offer a 60-day return or exchange guarantee on all brand-new items. Items must be returned in original, unused condition. Buyer pays return shipping unless the item is defective or damaged. Refunds are processed within 2 business days of receipt.
Customer Services
Q: When will my item ship?
A: Orders are processed and shipped within 2 business days of payment confirmation.
Q: Where can I find my tracking number?
A: You can find your tracking number in two ways:
Log in to your account, go to "My " → "Purchase History", and select the order.Check your email for the shipping confirmation notification sent by .
Q: How do I return an item?
A: We accept returns within 60 days of delivery. To initiate a return, please contact our customer service first. Items must be returned in original, unused condition with all packaging and accessories. A full refund will be issued to your original payment method after we receive and inspect the returned item.
response
We leave positive response upon receipt of payment. If you have any issues, please contact us before leaving response — we will resolve any problems to your satisfaction. If you are happy with your purchase, please take a moment to leave us positive response. Thank you!
Copyright of SCITOO-AutoParts . All rights reserved.
When you click on links to various merchants on this site and make a purchase, this can result in this site earning a commission. Affiliate programs and affiliations include, but are not limited to, the eBay Partner Network.

 Set 2 Front Complete Struts Shock Absorbers For 06-10 Hyundai Sonata 06-11 Azera$71.33
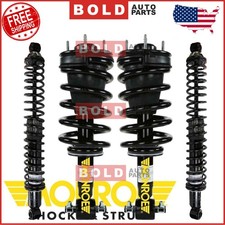 2 Front Complete Strut & 2 Rear Shock Set MONROE For Sierra Silverado 1500 4WD$427.95
 2 Front Complete Struts Springs Mounts + 2 Rear Shocks Fits 2005-2012 Xterra 4WD$172.00
 2 Front Complete Struts Shocsk w/ Coil Spring For 2007-2012 Nissian Sentra 2.0L$103.35
 2 Front Complete Struts for 2016 2017 Subaru Crosstrek$137.98
 2 Front Complete Struts + 2 Rear Shock Absorbers For Hyundai Sonata 2006-2010$111.10
 2 Front Complete Struts for 2013 2014 Subaru Outback$142.19
 Set 2 Front Complete Shocks Struts For 01-12 Ford Escape 05-11 Mercury Mariner$105.89
 www.userbars.org